Sorry/jammer/ 미안해요. I realise this is an old post (just reshuffeling on my blog abit :)
Coffee Plunger Cozy
Materials: Embroidery thread
Different colour fabrics
Sewing thread
Batting (this batting is similar to thick felt, +- 4mm)
Ribbon
Iron on Vilene/lining
The measurements of the plunger are 14.5cm by 29cm. Measure your own plunger for the exact measurements.
First cut a 14.5 cm by 29cm rectangle out of paper to make the pattern and place it on the plunger. Mark where the spout is and cut that piece out.
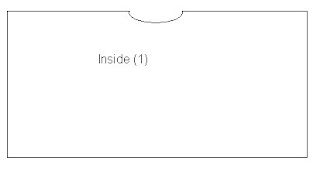
Use the pattern to cut the batting (cut exactly as large as the pattern). Cut the inside/ back(1) piece adding a 1cm allowance right round.
Cut the pattern into four pieces: A, B and C – 9.6 cm by 7 cm. D – 29 cm by 7.5 cm.
Place those four pieces on the different colour fabrics and cut them out, adding a 1cm seam allowance right round.
Take part A and attach it to part B, then attach part B to C and the attach D. Iron the seams flat. That will be the outside/ front(2) piece
Pin the batting to the back of (2).
Use the embroidery thread and sew a straight line across the fabric (on area D) about 0.5cm from the top of D.
Cut out the decoration/ motif that you want to use to decorate the cozy (I drew a coffee cup and used that). Iron Vilene onto back of decoration/motif. Pin the decorations in position and use the embroidery thread to sew it in to place.
Use white sewing thread to add “steam” twirls to the decoration.
Pin the front (2) and back(1) together, right sides facing each other. Sew on the edge of the batting. Even around the spout area - it will take the right shape when you turn it out.

Leave a small opening on one side to be able to turn the cozy inside out. Turn the cozy inside out and close the opening.


1 comments:
Love this!
Post a Comment